
Capricorn RC Lab TE02 Build and Review
Introduction Back in 2006 I took up RC model car racing as a hobby and raced 1:10 scale electric touring cars until winter 2009. ...
https://www.thercracer.com/2014/04/capricorn-rc-lab-te02-build-and-review.html
 Introduction
Back in 2006 I took up RC model car racing as a hobby and raced 1:10 scale electric touring cars until winter 2009. I had some success winning Cotswold Model Car Club's championship three times along with finishing second (TC) & third (M-Chassis) in a local indoor clubs winter championships. I also had a go at off-road racing winning a few 1:18 micro open meetings along with the BRCA national series 2WD championship in 2009, and on my return to racing in summer 2013 achieved second in a local 1:8 Rallycross club championship.
Previously I raced several different Tamiya/TRF touring cars but this time round I felt like a change. After looking at lots of different cars I chose the Capricorn-RC Lab-TE02. Capricorn are new to electric racing but have been long established as a well-regarded premium nitro on-road manufacturer. The TE02 from what I can ascertain is either an upgraded version of the Titan ARC R10-2013 or a very accurate tribute with parts being interchangeable between the two.
Unboxing


Carbon
The Capricorn-RC Lab-TE02 features a 2.25mm carbon chassis along with a 2mm top deck, 3mm carbon low profile shock towers and a carbon bumper support, battery retaining clamps and floating servo mount plate.
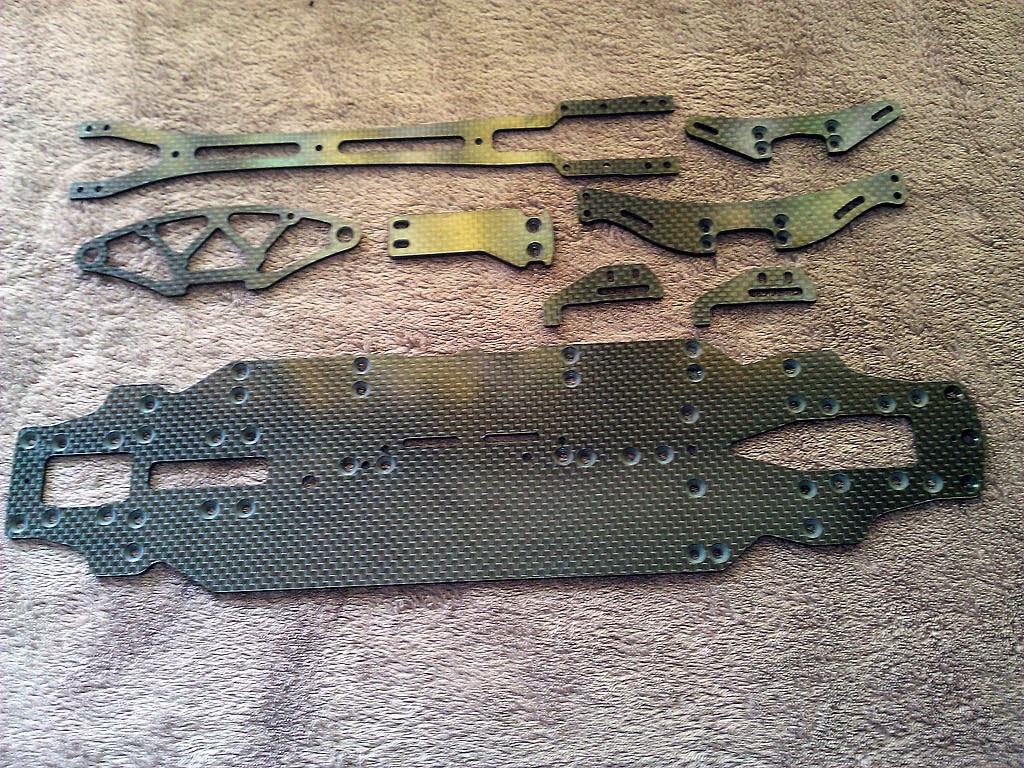
All the parts look well made and the narrow main chassis plate is milled slightly below where the motor would be. Minimal cut-outs give a clean look and a nice feature is the additional set of holes for shorty LiPo battery packs. The chassis and top deck have holes along the centre line for optional posts to be fitted to reduce flex in high traction conditions.
After lightly bevelling the edges of the battery clamps to reduce the change of the cell tape being cut I sealed the edges of all the carbon parts with Cyanoacrylate glue (super glue). Sealing isn't essential but I've always done so and never had any delamination problems. I use a 'Bostik Superglue Precision/Ultra Pen', so much easier and faster than other methods I've tried and results in a lovely smooth finish.
Bulkheads

Bumper & Body Mounts

The front body shell mounting columns/posts are supported by the bumper whilst the rear columns are connected to the shock tower. The body shell sits on top of plastic hats which can be positioned vertically on the columns using metal pins in the pre-drilled holes for maximum flexibility and fine tuning.
Diff &Spool

The spool features an aluminium axle, Kevlar reinforced plastic 38 tooth pulley and machined lightweight steel outdrives. The use of blade-less steel outdrives is a huge bonus in terms of durability over plastic or aluminium designs. A drop of oil in the bearings and thread lock on the three pulley bolts is all that's needed to assemble.
Ball differentials were the norm when I last raced touring cars but due to the constant maintenance required to retain a smooth action they have been replaced with miniature oil-filled geared units. The viscosity of the oil may be changed to infinitely tune the differential action to suit the track conditions!
The diff case and pulley (38T) are again Kevlar reinforced plastic along with plastic internal gears and steel outdrives. Red anodised aluminium eccentric bearing retainers are used on both the front spool and rear diff to adjust belt tension and are more resilient to compression than plastic items.

I pre-tapped the gear case holes with a spare 2.5mm screw, then using circular motions lightly sanded the surface of the case to remove any burrs and to gain a flat even finish. This along with 'Team Associated Green Slime' on all the rubber seals is strongly advised for a leak free differential. 1000 CST oil is supplied with the kit which I used after first pre-building the diff without oil to check for any roughness, which happily there wasn't. For my efforts I've been rewarded with a super smooth, leak free, rear differential.
Center Layshaft


The layshaft axle is supported by rubber sealed ball bearings at each end which are pressed onto the layshaft/motor mount towers. I found the bearings to be a tight fit so using 1200 grit wet & dry paper lightly sanded the red anodising to achieve a perfect fit. The parts were correctly machined but the anodising process was enough to affect the tolerances of mine. The 112 tooth 64 DP spur gear looks very much like a RW Racing item which is great news, however I intend to race in the 13.5T & 17.5T Blinky classes so this will be changed to smaller 70 tooth 48 DP spur to increase durability and obtain the ratios needed.
Drive Shafts

The rear CVDs use plastic blade protectors to reduce wear on the diff outdrives. I found them a real struggle to attach to the drive shaft pins and is something I've not encountered before. A quick email to UK distributor CPD Racing advised to clip one side of the blade protectors in followed by the other. I still couldn't using my fingers stretch the stiff plastic into place, so having clipped one side in I pushed the blade hard against a table to attach the other. This technique worked a treat and hopefully the plastic blades will be very hard wearing.
Oddly my front drive shafts came assembled but not the rear! I disassembled and cleaned all the parts with WD40 before coating the internal pins and inserts with 'Tamiya Anti-Wear Grease' and re-assembling. A 'G' shaped clip is used to retain the pins instead of a grub screw resulting in a much smoother functioning joint.
Independent Double Wishbone

The arms are the same left to right and may be flipped over to offer alternative lower shock mounting positions. Wheelbase is adjusted by varying the size of the supplied spacers in front or behind the wishbones. Droop is set using a small set screw going through the wishbone as per most other touring car kits. The wishbone inner hinge pins are supported on 5mm balls which sit inside recesses within the suspension brackets. I used a small amount of anti-wear grease on these balls for a smoother action and increased service life.
The suspension brackets, again red anodised aluminium, are of a split design towards the centre of the car to aid chassis flex and a single piece type at the outer ends. Shims may be placed below the mounts to adjust roll centre, the kit setting being 1mm all-round.
Shock Absorbers


The 3-hole 1.1mm pistons and lower spacer/shim are machined rather than moulded plastic so require no re-working and a 'Quad-ring' labyrinth seal holds the oil in. I put plenty of 'Team Associated Green Slime' on the seals to keep them lubricated and reduce friction plus potential leaks from the shock shafts. 500 CST silicone oil is supplied with the kit which I used along with the yellow (0.30) front and green (0.28) rear springs.
Anti-Roll Bars


Steering Rack


The turn buckle ends I pre-tapped with a spare screw before assembly along with some Associated black grease on the threads to make adjustment easier. Any screws not threaded into plastic I secured with a small amount of blue liquid thread lock. I also fitted a mixture of Losi and Team Associated foam dust covers to the ball connectors, whilst not essential especially with open ball cups they help keep dust and dirt out of the ball joints to reduce wear and stickiness.
Floating Servo Mount

The parts to the right of the above photo are the adjustable clamps used along with fibre cell tape to retain standard or shorty sized LiPo battery packs to the chassis.
Servo Horn

Electrics


With the Lab-TE02's narrow chassis installation of the electronics was tight but thankfully due to the use of a low profile servo everything has fit neatly on the main chassis plate without having to resort to stacking the transponder or receiver on top of the servo.
- Transmitter : KO Propo EX-10 Helios 2.4GHz SS
- Receiver : KO Propo KR-409S 2.4GHz SS 4-Channel Micro
- Servo : KO Propo PDS 2413 ICS Low Profile Fast Digital
- ESC : KO Propo VFS-1 BMC v1.5 (with ROAR Spec Blinky firmware)
- Transponder : AMC-RC Dp
- Motor : Reedy Sonic Mach 2 540 17.5T Brushless
- Batteries : Reedy 7000mAh 65C 7.4V 5mm Competition LiPo
Finishing Touches


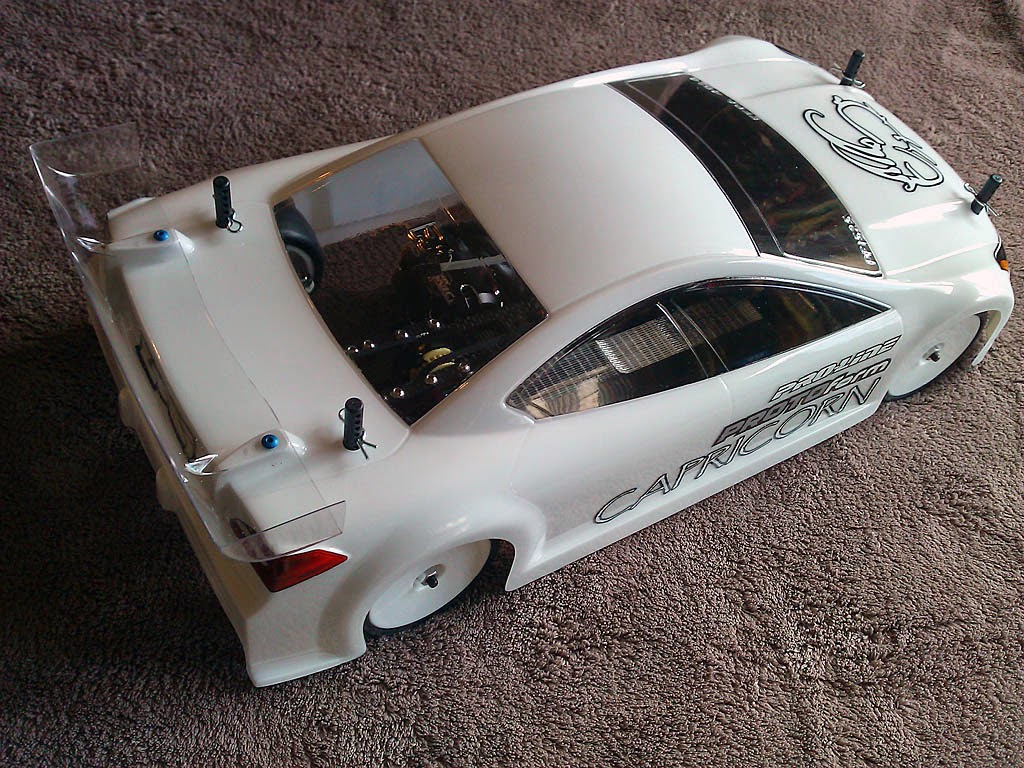
I finally fitted Sorex XG-28JB tyres with blue inserts and Revlite 24mm wide wheels which are the current favoured combination for carpet racing, the blue inserts being firmer than yellow ones used for asphalt tracks.
My completed Lab-TE02 weighs 1358 grams ready to race including the standard weight Protoform P37-R body shell, radio/electrics, LiPo battery (318g), transponder (7g) and Sorex XG-28JB wheels & tyres (100g). The assembled out-of-the-box kit excluding all of the above was 525 grams.
Test Run & Verdict

Set-up

Pros and Cons
Positives: The overall quality of the Lab-TE02 looks to be on par with touring car kits from the top established manufacturers. I liked how the car went together with no sanding, reaming or excessive shimming of the parts being necessary. Many parts which would be essential/desirable options are included with the kit such as the narrow chassis, floating servo mount and double cardan front drive shafts, plus innovations like the ball bearing mounted anti-roll bar, Ackerman inserts and big-bore shock absorbers.
Negatives: The instruction manual is a little lacking in detail in some places and includes no setup sheets (see capricornrc.com) or guides. I also had a few screws which were incorrectly threaded or with miss-formed (possibly non-metric) heads which is a shame considering the high quality of the rest of the kit.
Overall
On first impressions I'm very happy with my choice of car and look forward to racing it competitively indoors and outdoors this summer.
 This car looks to be an exciting new contender in 1/10 onroad RC. There are a lot of innovative refinements on this car and the initial testing shows a lot of promise.
Contributor John Timberlake
Contributor John Timberlake


