
54874 TT02 Adjustable upper arm set Review
The TT02 is Tamiya's most popular chassis. Affordable, versatile and reliable it is many peoples first experience with RC cars. As ...
https://www.thercracer.com/2019/05/54874-tt02-adjustable-upper-arm-set.html

The TT02 is Tamiya's most popular chassis. Affordable, versatile and reliable it is many peoples first experience with RC cars. As you would expect there have been a wide range of hop-ups for for the base kit, allowing people to tune their chassis to their own individual tastes. So it is good to see Tamiya providing a hop-up that is going to provide a substantial handling upgrade to a base TT02 in the form of the 54874 adjustable upper arm set.
So why do I need this?
The TT02 kit has fixed camber adjustments to ensure that it is easy to build and does not need any set-up knowledge to get a neutral handling car. Whilst this is fine for most people to run the chassis. Once you want to really refine the handling of the car, camber adjustment will provide you with the ability to make either the front or the rear of the car have more or less grip to help balance the cornering ability. I.E More grip at the rear if you have over-steer, or less at the rear if you have under-steer.The kit is compatible with TT-02, TT-02R and TT-02D chassis cars.
Who should not buy this?
Anyone with a TT02-S as you already have camber adjustments and it will not fit. Also those of you who have the front TT02 carbon tower. Apparently Tamiya say that this part is also not compatible with the 54639 TT02 front Carbon shock tower.So lets take a look.

The contents are:
- Plastic upper Arm sprues x2
- Stainless steel Turnbuckle Shafts x4
- Low-Friction Suspension Balls x2
- Tamiya wrench
- Setting screws x6

The plastic arms are made from the same hard plastic as the early TT02D kits and are a light grey colour. This is a glass filled plastic which is very stiff, dense with a high tensile strength, it is also lightweight.

First up its time to build the front arms.

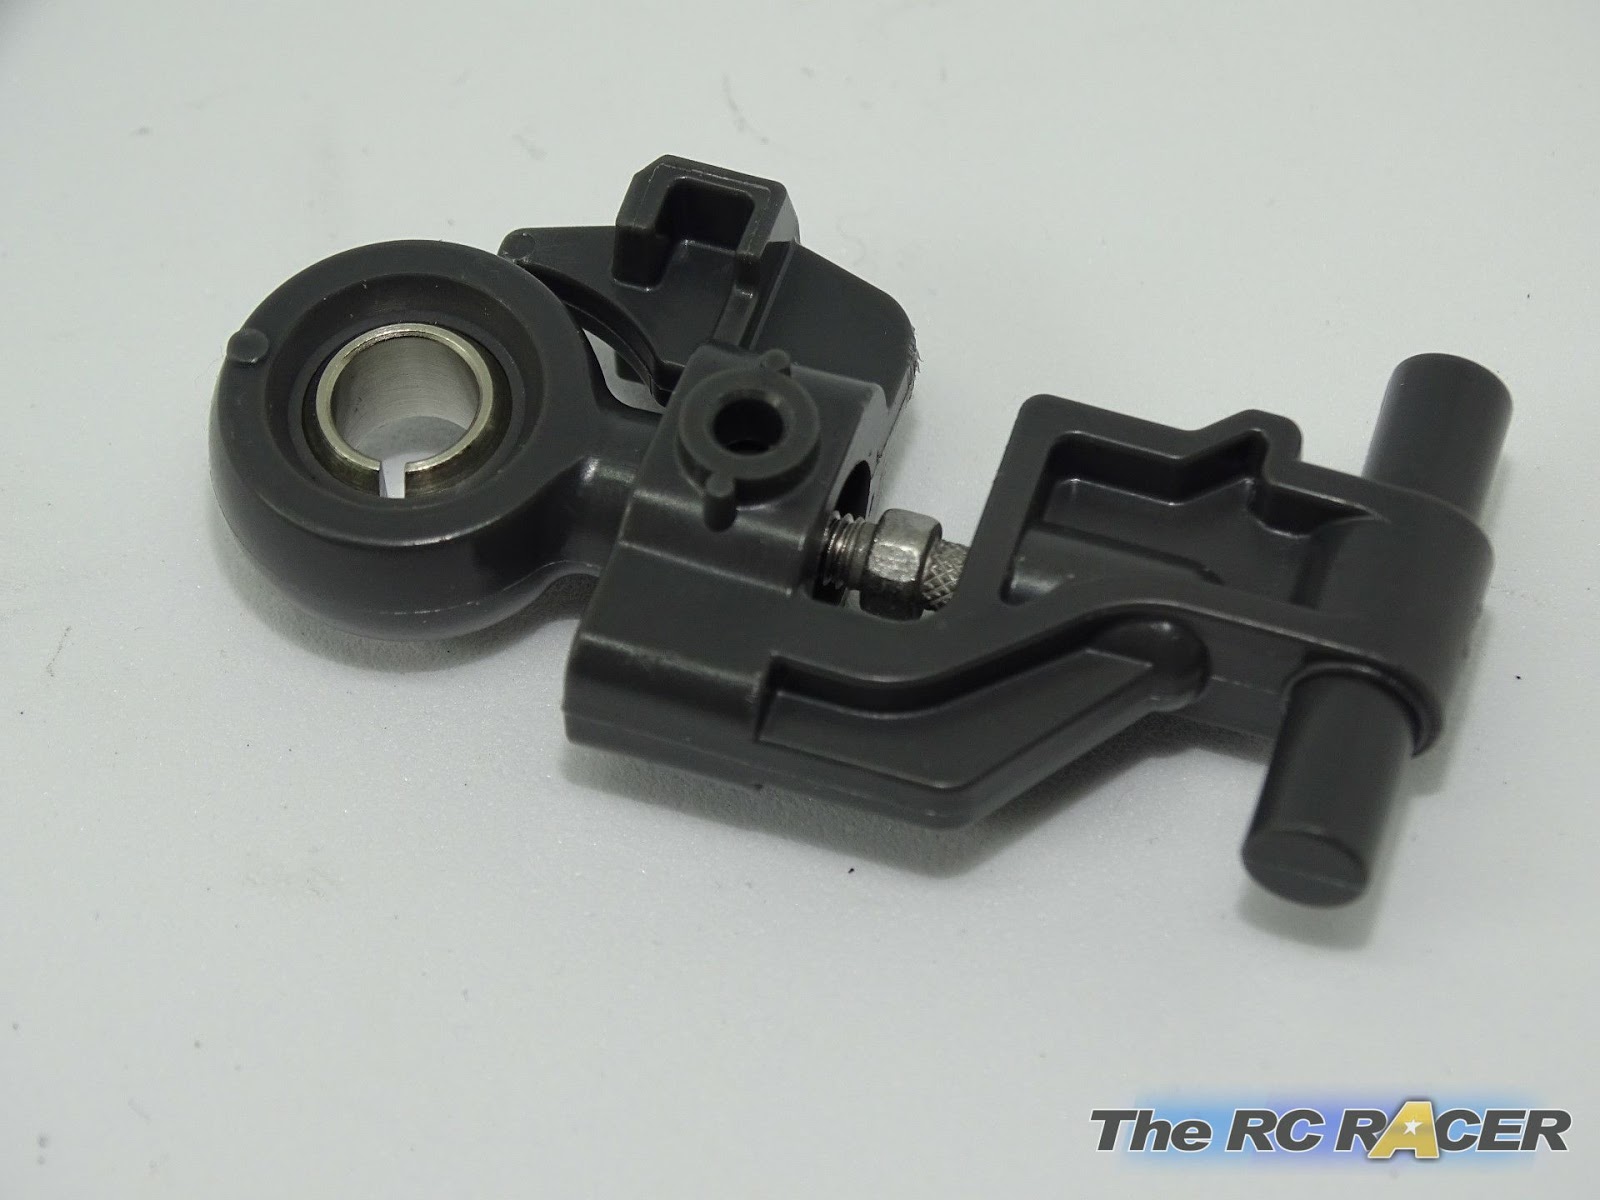
The included wrench is supposed to help you screw in the turnbuckle, to be honest it is quite cumbersome so I just used a separate wrench to screw it in. You want to screw it in so that the centre of the turnbuckle is in the middle of the gap in the arm.

Now you need to clip in the low friction suspension ball into the outer section of the arm. They clip in quite easily as long as you insert the balls in the side that has the little dot (As seen above).

Now you simply need ot screw this end onto the turnbuckle. I used a set of long nose pliers to hold the turnbuckle straight and screwed the end on.

You want the final front arm to be 49.5mm long when assembled.

Now you need to clip in the low friction suspension ball into the outer section of the arm. They clip in quite easily as long as you insert the balls in the side that has the little dot (As seen above).
Now you simply need ot screw this end onto the turnbuckle. I used a set of long nose pliers to hold the turnbuckle straight and screwed the end on.

You want the final front arm to be 49.5mm long when assembled.

The rear arms follow the same basic construction and fit together quickly.

You want them to be 44.5mm.
Weight

These arms are 6.55g each, 1.69g heavier than the original arms that weigh in at 4.84g

The rear arms are 4.58g each, the originals are 3.46g, so only 1.08g heavier
Overall with all four arms that is only and additional 5.5g of extra weight. A negligible amount for the extra tuning possibilities they present. You can shave around 2g off by substituting the steel turnbuckles with the aluminium versions, but they would make the arm weaker so unless you are confident of not hitting much I would steer clear of doing that.

Time to install them into the car. They are a direct swap out, I shim the arms on my TT02's to avoid any excessive movement.

Adjusting the Camber.

So you have the arms installed, you want to adjust the camber. You need a camber gauge and a flat surface such as a set-up board, glass table etc
To measure, I use my trusty Tamiya 53861 camber gauge. It covers all the settings you will mainly use for onroad racing.

To measure the camber you simply roll the car on a flat surface and then align the camber gauge so that it is along the surface of the table / set-up board and position it against the wheel along the axle.
If the top and bottom of the wheel touch the side then you are correct, if the top touches it and the bottom doesn't you want reduce the amount of camber, if the bottom touches and the top does not you need to add camber. The picture above shows a perfect 2 degrees camber.

To adjust it you need a good turnbuckle wrench or a pair of pliers. You can get quite a large range of camber adjustment with these arms, but as a base setting I would have 1.5 front and 2.0 rear.

Once you are happy with the camber, you then have to add the locking screws. These are a good idea for this type of arm, they will make it stronger and hold the turnbuckle in place in the plastic. Tighten them down well, although remember to loosen them before adjusting the camber (Ahem!).
Overall

Importantly the 54874 Adjustable upper arm set has helped transition a stock TT02 into something a little more complete as race car. It is not going to transform the car overnight, but the point of a TT02 is to develop alongside the chassis. In my opinion it is one of the most effective hop-ups available for the base TT02.


