
HoBao H4E Pro touring car kit Build tips and Review
The HoBao H4E Pro is HoBao's 1st 1/10th Scale Electric Competition Touring Car. It has been designed to compete with cars s...
https://www.thercracer.com/2013/11/hobao-h4e-pro-touring-car-kit-build.html

Whats in the box?
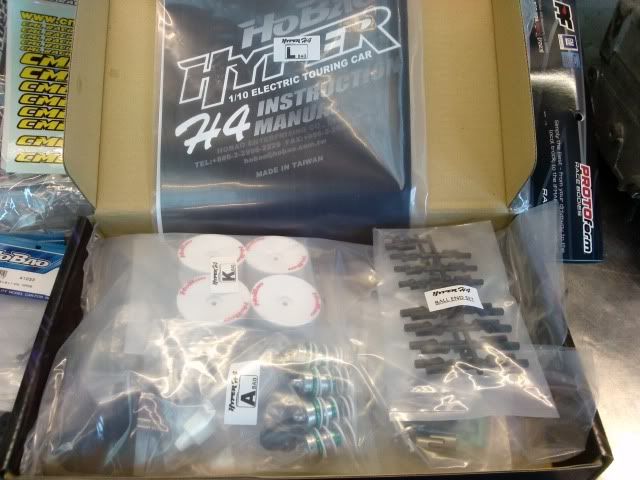
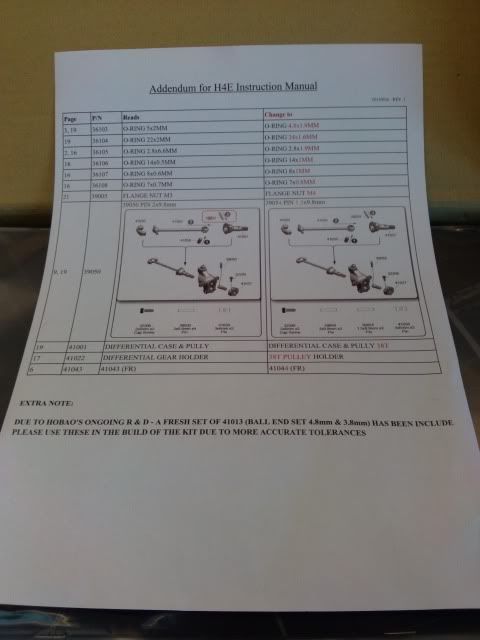
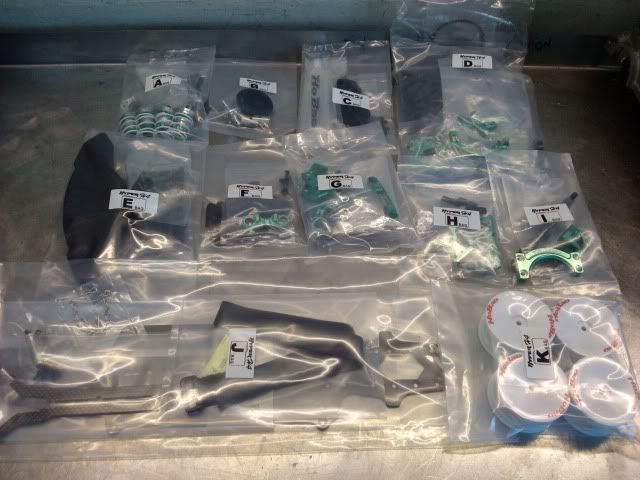
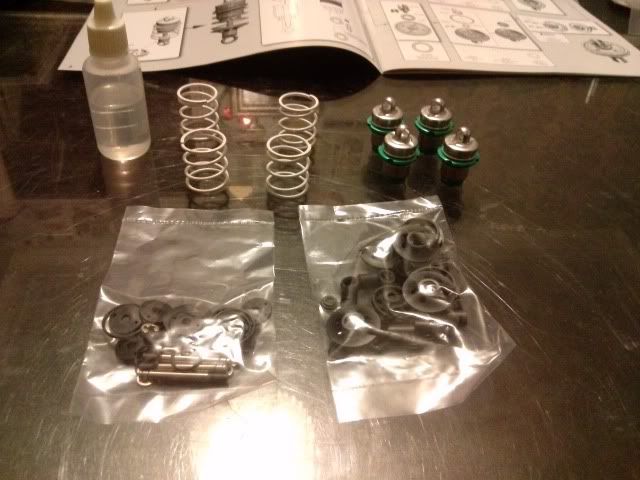
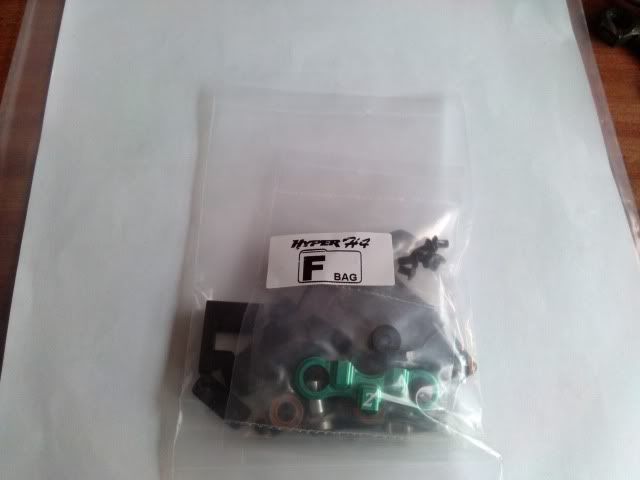
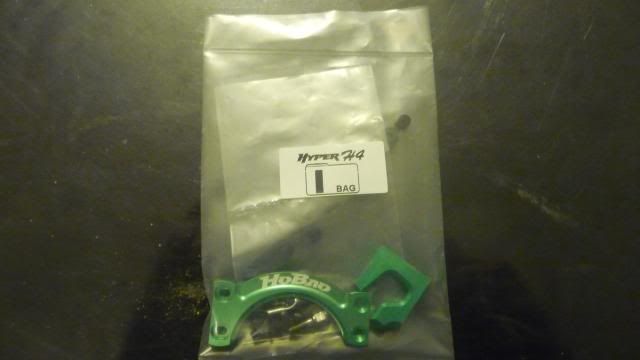
On first opening the box you are greeted by a well packed bag full of parts and a nice full size A4 instruction manual. Note the extra set of ball studs in the bag on the right. These are additional ball studs supplied with the kit because HoBao felt the ones contained with the kit originally (the originals still come with it) were not to the correct tolerances as explained on the Additional information leaflet seen below. This is something nice to see because it means HoBao are keeping an eye on the quality of there products and are impoving them.
Right lets get building!
1st of all I got all the carbon parts out and sealed the edges. I don't round the edges off like some people do as I feel the sharp crisp edge looks better. To seal the edges I use a cotton bud and drip a little super glue on it then run it around the edges. While I was sealing the edges it gave me a good chance to have a close look at the quality of the carbon and I have to say its top quality, nice and tightly packed together and very cleanly cut. There is a slight difference in the colouring between the shock towers and the top and bottom decks but its not really noticeable once it is built.
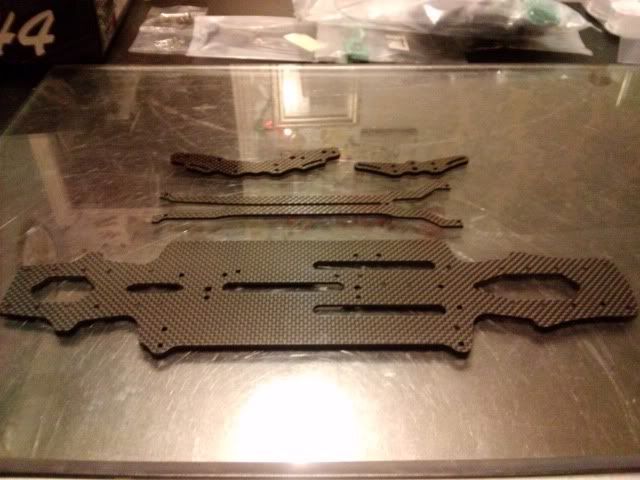
Nice square sealed edge
Shocks
1st stage in the manual is to build the shocks.
In the bag you get a set of medium white springs, 2 sets of shock pistons ( a set of 2 hole and a set of 3 hole), 20wt shock oil, shock bodies, seals, shafts and the srping retainers
While building the shocks I decided to put the 3 hole pistons in as a starting point because my previous car worked well with 3 hole pistons.
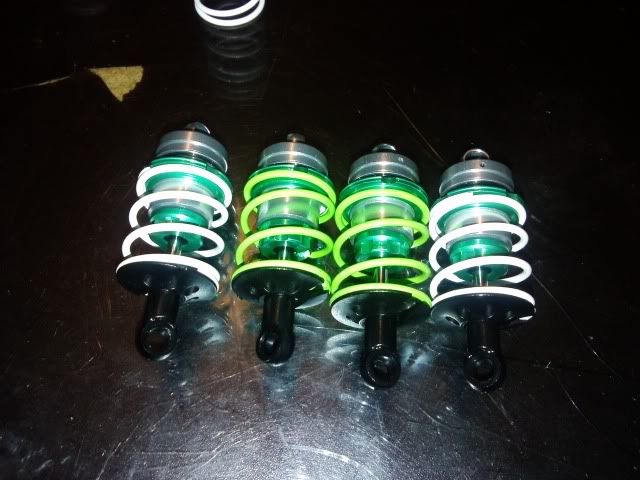
When I ordered the car from CML Distribution I also ordered the two optional spring sets, one set of soft and one set of hard, when the spring sets turned up I was pleasantly suprised to find that instead of the usual 2 springs that you get from most manufacturers you actually get a full set of 4 of each spring. I built the shocks up with hard springs on the front and medium springs on the rear.
The shocks go together nicely although they do feel a little tight. I am planning to give them a run at my 1st race meeting then strip them back down to see how they feel. If they still feel tight I will sand the piston edges so they aren't so tight on the sides of the shock body and possibly very lightly polish the shock shafts.
I was a little concerned about using 20wt oil in the shocks but have been reassured that because the shocks are "super big bore" that they don't need to have the usual 40wt or higher oil in them, I have some 25wt to try aswell but the 1st runs should give a good indication.
The finished shocks (Green springs are the optional Hard Springs)
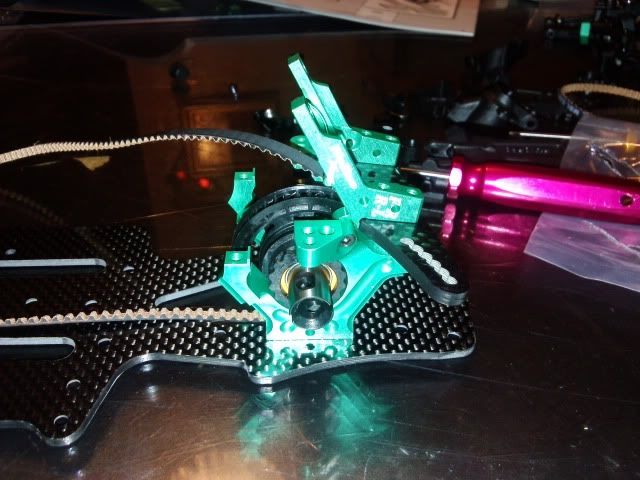
Front Spool and Rear Gear Differential
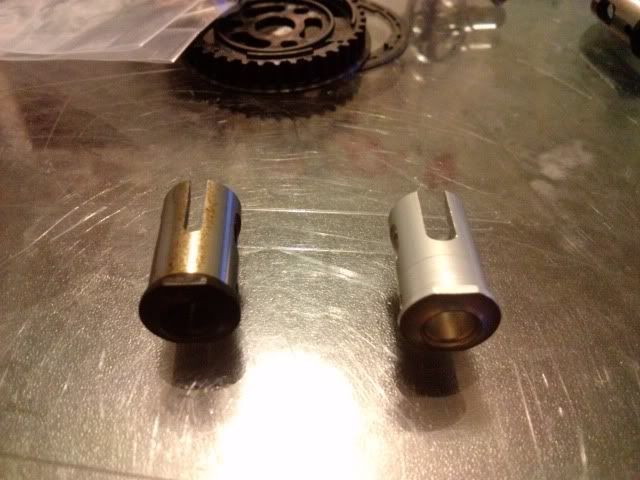
Next stage is to build the spool and gear diff. These both come seperatly and neatly packaged. I ordered the upgrade steel spool outdrives to go with the kit as aluminium outdrives do tend to get a hard time when using a spool indoors.
Contents of spool bag
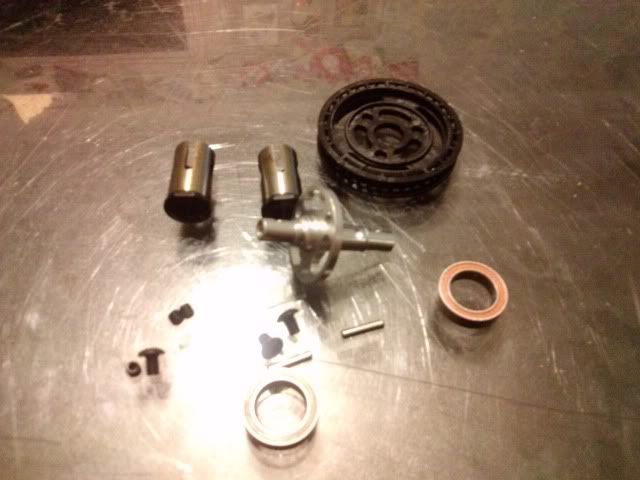
Upgrade steel outdrive on the left
Gear diff bag contents

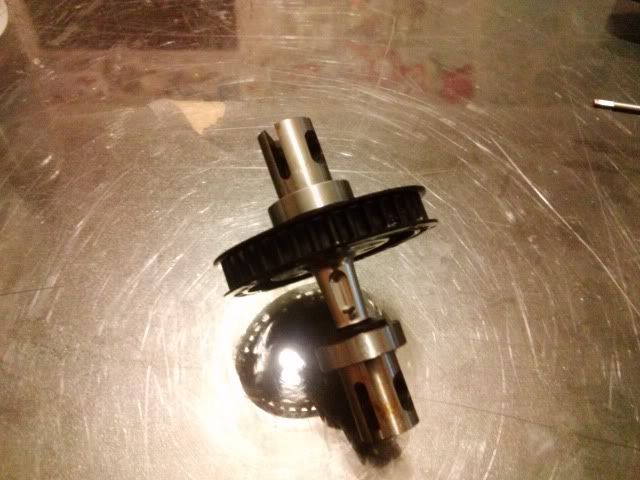
Spool Build
The spool is very simple to use, everything is machined to very close tolerances so screws together nicely. The bearings hold the pins though the outdrives so there is no chance of them falling out once the spool is fitted. I did find that the bearings where very tight going over the steel outdrives so I used some fine wet and dry paper to just polish them a little for a better fit. This wouldn't have been an issue with the original outdrives as they went straight over them.
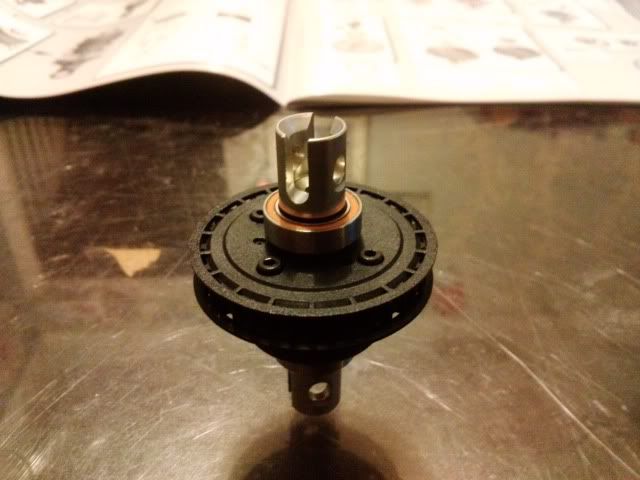
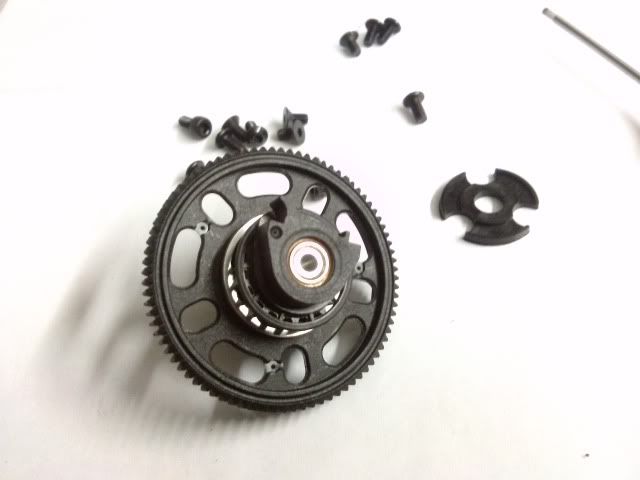
Gear Differential
The gear differential is one of the nicest gear diffs I have built! There is no excess flagging on anything so its all nice and smooth and has pretty much no play atall, it even comes with a tube of 1000cst oil to put in the diff. When I put the seals in for the outdrives to go through I coat them with Tamiya VG grease inside and out, Associated Green Slime or similar can also be used, it helps to minimise the chance of leaks. The outdrives then have go through the seal smoothly and a supplied shim goes under the pin that holds it in, I was a little worried that only one size shim is supplied and that I would have to buy some smaller ones to get rid of any play but once again the machining and tolerances were spot on, one shim and its perfect, it may need re-shimming after some use but time will tell. The gears all dropped in nicely, the little planet gears and even shimmed on the x pin to make sure everything is perfect. I filled it with the supplied 1000cst oil as a starting point and as my previous car was using 1000cst. The hardest bit of building this diff was the next stage, there is a large rubber o-ring that goes around the inside of the lid and it was a complete pain to get to stay in place, once it was in place though it did stay where it was supposed to. It makes a nice change to the paper gasket used in some other gear diffs. I screwed the lid down and left the diff while I had a cup of tea then re tightened the screws.
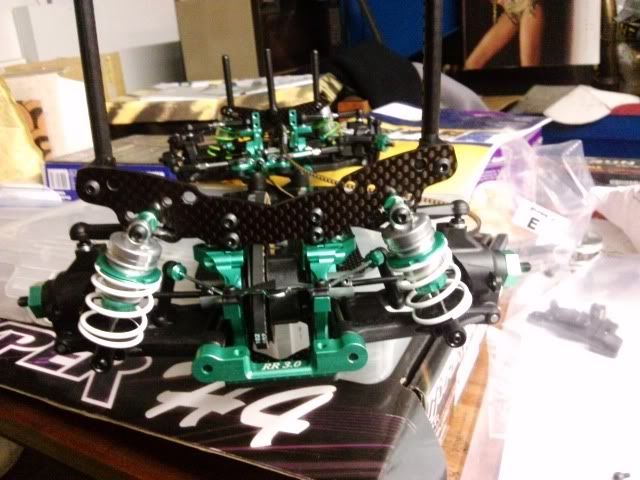
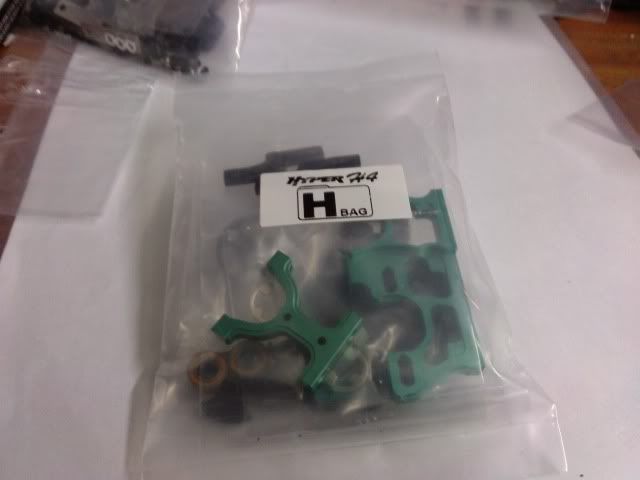
Front Suspension and bulkheads
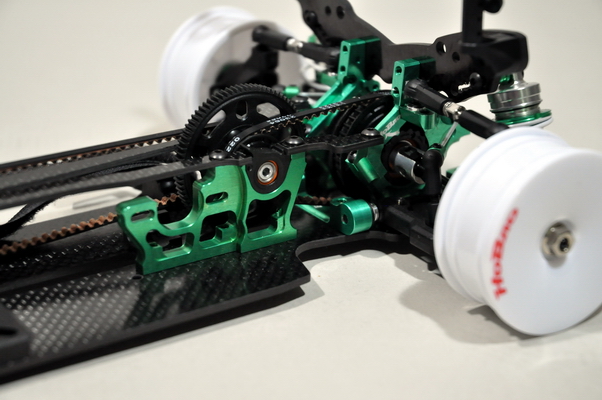
Next up was a bag I had been looking forward to getting into. I had been keen to get a look at the anodised green aluminium and I love it, the colour is very different to all the other touring cars on the market and the machining is once again top quality.

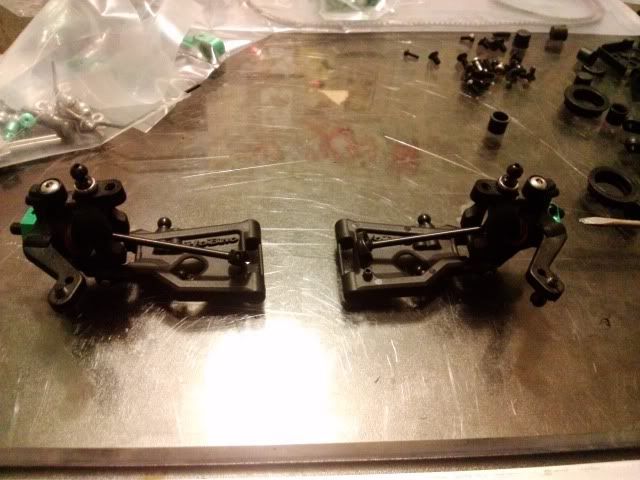
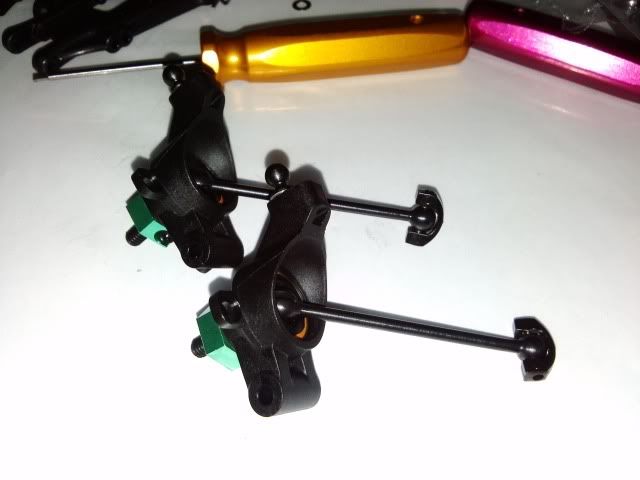
Suspension Arms/Hubs
The front suspension arms/ hubs were next to build up. These are not your usual arms and hubs, they are not like anything I have seen on a touring car before, their more buggy style but this should mean they will be strong. The arms also are not 'webbed' as most tc arms are, they have an almost completely solid inside, i believe this is so they could make the centre piece thinner plastic to get some flex but retain the strength.
The hubs and c hubs although unconventional go together extremely well and easily, I tapped all the various threaded holes with an m3x0.5mm tap to make sure that everything goes together smoothly. During this stage the double cardan front driveshafts are fitted. These come pre built but I stripped them down to give them a little grease, again I used the Tamiya VG grease. The driveshafts are nicely made, no grub screws to come loose, the pins are held in with a spring clip, the spring clip design is better than on my TRF417's Double Cardan Shafts as on those the clip would sit very close to the hub and actually caught and pinged the clips off, on these there is plenty of distance between them. Once the shafts were reassembled and fitted into the hubs everything could be tightened up. The hubs and c hubs work smoothly if a little tightly but these will be checked again after the car has been run.
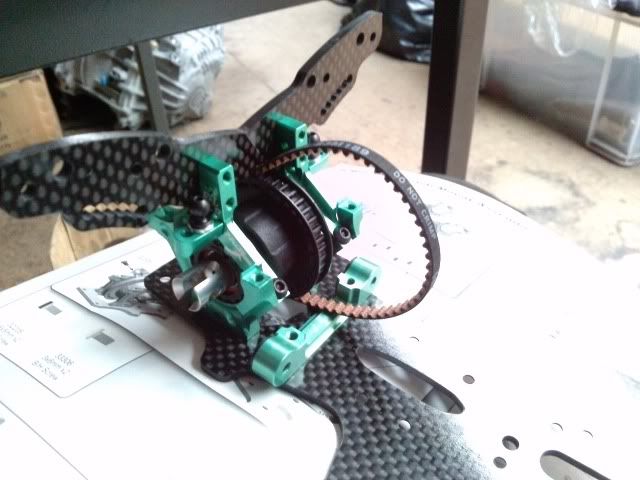
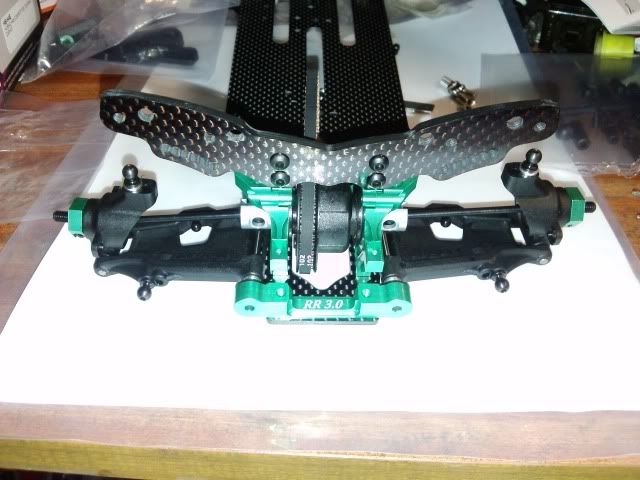
Front bulkhead assembly
The front bulkheads are your conventional design but with an awesome twist. When access to the spool is needed you simply pop the shocks off the arms and undo two screws, then the whole top of the bulkhead hinges to enable the diff / spool to be removed or the belt tensioned etc.
The bulkheads fit easily to the chassis with everything lining up nicely and sitting straight. The spool is then dropped into place once the adjustable cams have been fitted to it.
The suspension mounts are just like alot of the top spec chassis, they screw to the chassis and have ball pivots that push into them to hold the hinge pins. On the HoBao there is a plastic insert that fits into the arm mounts and then the ball sits in this, this is a good idea as rather than having to buy expensive aluminium suspension mounts when the get a bit worn you can just buy the plastic inserts, one problem i found with these inserts is that they are a very tight fit, I thought I had them fully in the 1st time but they were not. What I did in the end was to start them on the hole and then actually push them against the corner of the table until they kind of clicked in. The balls slot into the inserts easily and I put a little of the Tamiya VG grease on them. The hinge pins go smoothly through the arm, no need to ream or put a drill bit down them. In the manual it lists the spacers to put on the hinge pin on each side of the arm, I left one of the 0.2mm spacers off each side as I felt it was too tight with it on, I may put it back on once the car has been run depending on how much play develops. The arms can now be fitted.
The camber links are nice and easy to build up. I used the new ball studs included with the kit as the additional information says. I tapped the ball studs with an m3x0.5mm tap so they went together nicely. The manual gives a recommended starting length for the links.
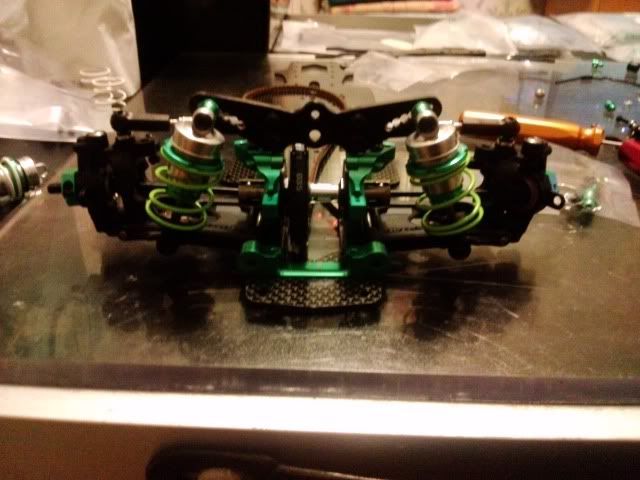
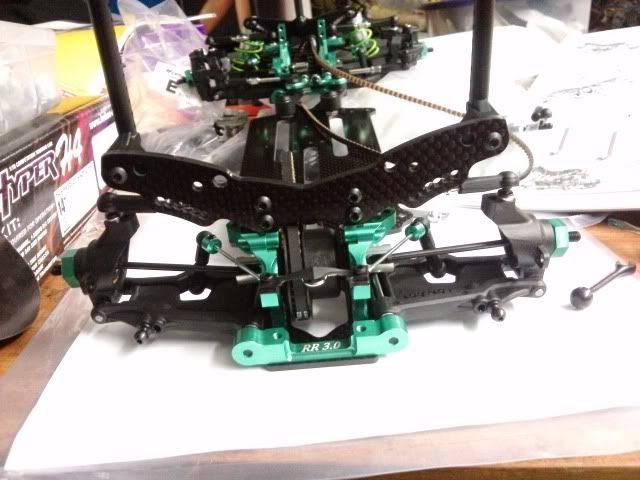
The shocks are secured to the shock tower with some nice green aluminium posts and pop onto the balls fitted to the arms.
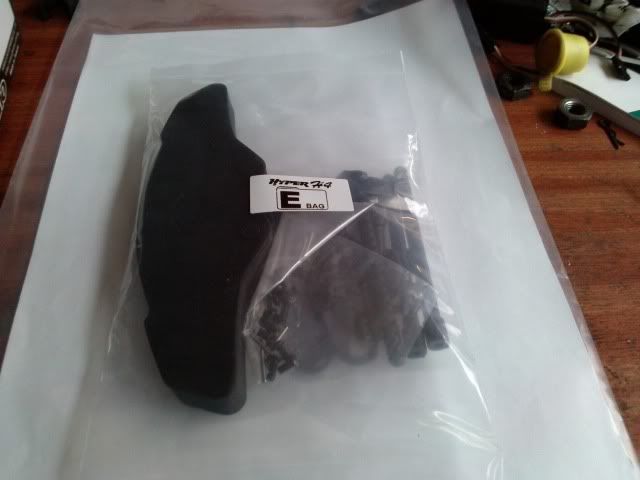
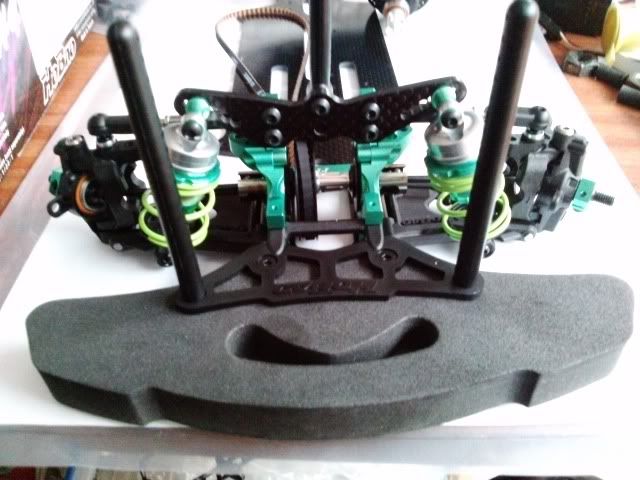
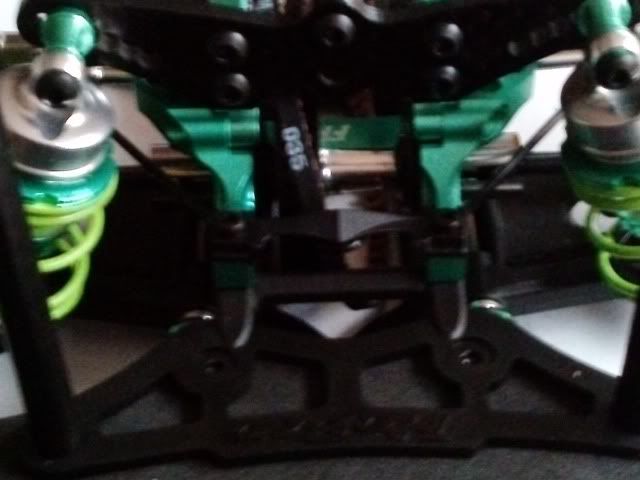
Front bumper and body posts
The front bumper is the usual foam bumper supplied with most touring cars, its nicely shaped and cut cleanly.
The plastic brace simply screws to the chassis and the posts screw to it. The bumper then slides down onto the posts and the top plate screws on top. There is also a 3rd mount that attaches to the shock tower for better front end bodyshell support.
Steering
The steering system uses a twin bellcrank setup as found in most touring cars.
The whole assembly is secured to the chassis using two alloy posts. The bellcrank arms are plastic but have twin bearings to keep them nice and supported, I was hoping that these would be aluminium or that there would be an optional part to change these to but at present there isn't. Ontop of the bellcrank arms there is a 2 degree ackerman plate, there are two optional ackerman plates with 1 degree and 0 degree of ackerman. The ackerman plate also runs on 2 bearings that runs smoothly on the ends of the bellcrank arms. One thing I noticed while building this part was that if the screws that hold the ackerman plate onto the arms are done up too tight the whole thing becomes very tight, I believe this is due to the very wide plastic washers used here, I am going to have a play around with different washers here and see if i can solve this although even with the screws backed off so it moves freely there is still no play in it.
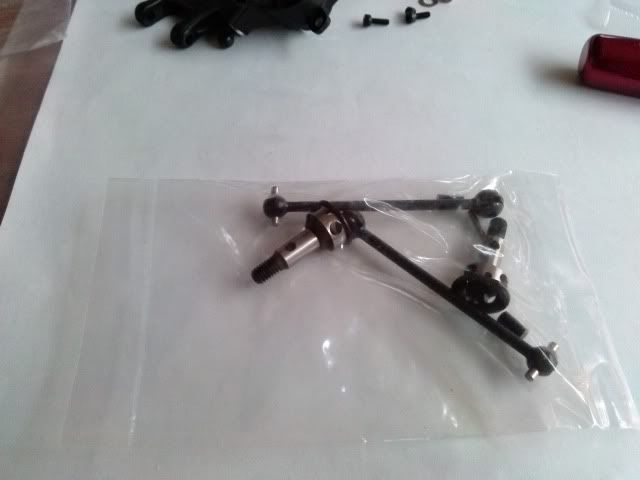
Anti Roll Bar
The front anti roll bar is next to be installed. These have a neat clamp to hold them on that keeps the bar central at all times. The anti roll bar links are made up of two small rod ends (fromt the extra supplied set) and a long grub screw. The manual gives a starting length for these. Once the links are made a ball end is secured to each end of the anti roll bar and then it is popped into the links. The centring plate screws to the top of the bulkhead.
Rear Bulkhead assembly

Assembling the rear bulkheads is exactly the same as doing the fronts and they fit together just aswell.
Rear driveshafts
Unlike the front driveshafts these come unassembled and are not double jointed as there is no need on the rear of the car.
Instead of using grub screws to hold the pins in the shafts HoBao have cleverly used the bearings that go into the hubs to secure them, this makes building the shafts incredibly easy and problem free.

Rear Suspension
The rear suspension goes together much like the front although alot simpler. The hubs are a little tight in the arms but should loosen up once the car has been run. If it doesn't loosen up I shall sand the hubs very slightly to get a nice smooth action.
The rear suspension mounts are exactly the same type as the front so the same method is used to put them together. On the hinge pins I left one 0.2mm shim out on both sides because I felt it was a bit tight. The rear of the suspension arm mounts determine the amount of toe in. The kit comes with a 3 degree toe in rear block but 2.7 and 2.85 degree blocks are also available.
The rear anti roll bar and camber links go together and fit exactly as the front. The roll bars are the same shape front and rear which makes setting up the car a bit easier as you only need to buy one set of roll bars.
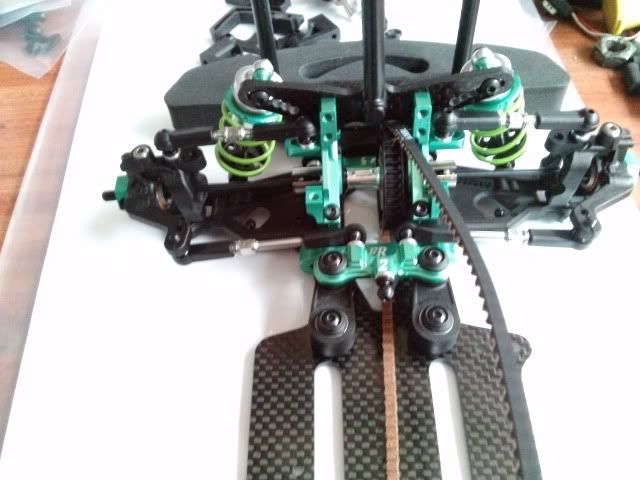
Shocks fitted
Layshaft and motor mount
The layshaft and motor mount are more nice green aluminium.
The layshaft is a simple to make, precisely made part. It has a nice aluminium hub that the spur gear is held onto by a circlip on each side. High quality bearings allow it to spin nicely.
The layshaft mount and motor mount bolt nicely to the chassis
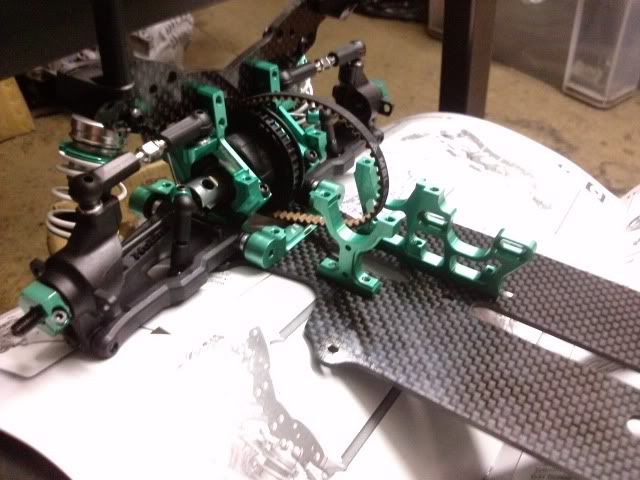
The layshaft slots nicely into the layshaft mount and is held in by the top deck and by the two carbon plates that join the rear bulkhead and layshaft mount. When putting the layshaft in you need to make sure that you get both the belts onto it before slotting it into the mount.
When I have time in the future I would like to make some rear carbon links that are different thickness's so I can play with the flex at the rear of the chassis.
Servo Mount
The servo mount system is a one sided "floating" servo mount, these are used in most touring cars now as it allows the chassis to flex equally across the front of the car.
It is made of yet more nice green aluminium. Its a shame both sides of it are not aluminium but the plastic outer leg will work absolutely fine.

Top Deck
The top deck is relatively simple to fit. It just sits on the bulkheads and layshaft mount and screws down to them. Before tightening it down fully you must make sure the car is on a completely flat surface then push the car down onto the surface using the centre of the shock towers then do the top deck up. This ensures that you don't tweek the chassis.

Battery Stops
There are some nice little stops that shield the belt and stop the lipo moving inwards. These simply screw to the chassis BUT there is a problem with these, once they have been screwed to the chassis the locating lugs stick out through the bottom of the chassis so the car will not sit flat on a setup board. To get round this simply sand one or two millimetres off the lugs and problem solved.
Lipo Tags
The chassis also comes with a pair of tags that screw to the chassis to stop the lipo sliding
Installing the radio gear
There is plenty of room along the motor side to get most electrics in. The most awkward part is getting the back of the two motor screws through to the motor, it is easier to get the screw through with the layshaft removed so I would recommend putting the motor in loosely before installing the layshaft.

So the car is now complete. All that is left to do it get it setup.
Opinions so far of the HoBao H4E Pro
Well the car goes together nicely, I do feel the instructions could be nicer, they aren't to the standard of companies like Tamiya and Associated but they are readable and do show you how it goes together. The actual quality of the kit seems very good, all of the parts supplied fit together well and it all feels well made. The suspension seems a little tight at the moment but as with my TRF I believe that it will become freer after it has got a of races under its belt. One thing that was really nice with the parts is that every bag had a couple of spares in, for example there were a couple of spare c clips and shock seals in the shock bag as its not uncommon to loose them and in the suspension arm parts there is a couple of spare grub screws and droop screws.
Once I have raced the car for its 1st meeting I will strip it back down to assess how free things have become and wether anything needs to be addressed.
Track Test and setup changes are here


Hi Mark, thanks for the writeup, much appreciated. How much racing have you had with the H4 yet? Does it roll equally as fast as other designs? Is it really just as competitive as the XRay?
ReplyDeleteHi RedChevyNova I have done approximatly 16 races with the car now. It will keep up and beat the T4 14, Schumacher Mi5 and similar cars with the right driver. It really is lovely to drive and work on.
ReplyDeleteHi, just a quick tip with fitting the o-ring in the gear differential. In the groove where the o-ring sits, use a needle shaped file and lightly score a groove all the way round it's diameter creating a slightly larger indentation. Put the rubber o-ring in very hot water and leave for 10 minutes before taking it out and drying it (the heat slightly expands the rubber making it easier to fit). Fit the rubber o-ring and it should stay in place!
ReplyDelete