
HPI RS4 Pro 2 Japan edition 3 Build and Review
https://www.thercracer.com/2023/01/hpi-rs4-pro-2-japan-edition-3-build-and.html
In the late 90's, HPI were making progress in the racing world. They saw the potential of the touring class & were producing cars to adopt this class.
They started with the RS4 platform in a sport format, but also released a pro version. These proved to be great cars & a very versatile platform.
It was only natural that they would follow-up their success with the Pro 2 chassis. This also marked the start of using purple as their signature anodising colour. The pro 2 builds on the original platform but features a range of tweaks & updates to keep the car competitive.
The development was swift & continuous. They released a special Japan edition that contained the upgrades that the team drivers considered essential. The Japanese were the main development team behind the project, so it was exclusive only to their domestic market. There was an edition 2 that was again available only in Japan that continued the trend. There was a final edition 3 that was available in the USA & Japan as they were also involved in the development. Although still rare, not as rare as the other editions. This was available as a stick or saddle pack format
I'm my early days of racing, I used to borrow my dad's sport 2 that had a lot of Pro 2 upgrades. I used it to compete in a couple of HPI challenge races here in the UK
Last year, I managed to find a new in box Japan edition 3 stick pack edition. A very lucky find that was never built. The box has a little fading on some sides, but everything appeared to be there
On the front, there is a list of the upgrades included. Here is the list
1. Dodge Stratus lightweight bodyshell 190mm
2. 33deg 24mm tyres
3. Red foam inserts
4. Threaded aluminium shocks
5. Blue pro linear springs
6. Heatsink motor plate
7. Aluminium side plate heatsink
8. Aluminium centre mount
9. One way front differential
10. Aluminium 15t one centre pulley
11. Graphite diff outdrives
12. Carbon shock towers
13. Turnbuckles
I also found some other upgrades that I will be fitting on the way
1. Pro 2 handling pack
2. 6mm clamp hex hubs
3. Aluminium lower spring retainers
4. Aluminium lower front pivot mount
5. Aluminium 8 Deg C hubs
6. Aluminium rear upper link mount
7. Moodyfools titanium screws
.jpg)
The manual has a detailed layout that contains every part listing & sizes of parts/screws. This edition has an separate manual that shows all the updates & different screw sizes where necessary
.jpg)
The Japan edition has a separate manual that highlights the upgraded parts. Some plastics are also updated. Some numbers were listed differently than required. Some parts needed rebuilding with the correct parts later on.
The handling kit also a separate manual, so I had to work with 3 manuals in total!
Rear bulkheads
These have plastic inserts that adjusts the rear belt tension.
.jpg)
You will need to strip the complete rear end to adjust the tension. The rear suspension arms are mounted to the bulkheads
.jpg)
The aluminium motor mount , layshaft & centre mounts are all added at this stage
Ball differential
This includes the graphite outdrives with rings that clip over to prevent splitting.
.jpg)
The diff rings are also keyed to prevent slipping compared to the rounded ones in the standard kit. Apart from that, it builds like many other ball diffs, so not much to say here
Layshaft
A one way pulley is included as this was the fastest option at the time.
.jpg)
I feel that I will want to use the brakes, so managed to source a used layshaft with fixed pulleys.
.jpg)
There was some slight wear, but replacing the pins sorted it out!
.jpg)
The carbon shock tower braces the rear of the bulkhead & straightens everything up. It has 6 holes. The lower 3 will make the shocks lower, may be used for my future plans with this car
Driveshafts
Back in the early days, MIP were known as the team who made the best CVD's available on the market. HPI knew this & commissioned them to use their CVD's in a lot of their kits
.jpg)
The units are different front & rear. The rears have a longer axle, but the fronts have a longer dogbone, I'm guessing this will aid with steering. The fronts also use an integrated guide for bigger inner bearings. As this is an American company, a 0.050" Allen key is provided for the grub screw. I chose to use CVD oil rather than grease & my preferred thread lock.
Lower deck
Once the shafts are assembled, I can now assemble the rear end to the chassis.
.jpg)
The chassis is unique to this car. As it's a stick pack, there are no slots for saddle pack batteries. It also appears to be more of a Matt finish to the carbon, maybe a special production run?
.jpg)
Before I attached it, I mounted the handling kit. This is a carbon part that raised the rear section to increase roll. These days, you use shims under the pivot blocks, but the whole assembly needs to be raised for this car. It also included a carbon spacer that sits between the front bulkhead & top deck to make the top deck sit level
Steering
This car uses an integrated servo saver on one steering arm. There is a spring assembly that will allow movement in the event of a crash. I never had much luck with this when I raced in my early days, they would loosen & give poor handling & took too long to diagnose as I would chase other issues & wouldn't consider it a problem.
.jpg)
I chose to tighten it up as much as possible (without tools!) & I will use a servo saver on the servo itself if I need to. That arm doesn't use any bearings, so it's not as smooth as I would like.
.jpg)
The opposing arm sits on 2 bearings. The amended manual says to use a different arm, but made it sit way too low in comparison to the other side, so I used the original kit recommendation
.jpg)
The turnbuckles are 3 different materials in 3 different colours! A mix of alloy, steel & anodised alloy. The turnbuckle plastics threaded on ok, but are very tight on the balls. I swapped these out with the later heavy duty units you found on the Pro 4.
Front suspension
The front hubs are assembled & attached to the lower pivot block. As previously mentioned, I had some new/used alloy parts from my previous car, so I was keen to fit them. I used the 8deg alloy C hubs along with the 2deg lower pivot & 2deg upper mount to give 10deg of caster.
.jpg)
Quite a lot compared to these days, but in the middle range of this kit. Using those parts gave the kit caster, but using different parts, I always have the kit plastics if I need to change it.
.jpg)
The lower bulkhead & front attaches through the pivot to connect everything up. It adds strength as everything is help together rather than separate mounts.
.jpg)
I managed to find someone in the states that has made a spool front diff for this car. The car will now be a lot easier to drive as I can use the brakes.
.jpg)
There is no belt adjustment on the bulkheads, it uses the belt tensioner on the rear layshaft mount to adjust tension
.jpg)
When I attached the upper links to the hubs, I would they were binding. I will look to grind a small section on the hub as if I weaken the plastic, it may snap off
.jpg)
The second part of the handling kit slots in under the upper deck before fitment. This raises the top deck to sit level where the rear end was raised previously
Shocks
The standard kit uses an alloy body that uses clips to raise/lower the ride height. The lower body is only pressed on to hold the O rings
.jpg)
The updated shocks also use a alloy body, but has a threaded collar for a more presise ride height adjustment. There are 2 O rings in the lower body, but a couple of spacers & all secured with a circlip. I used the 3 hole pistons as I always start with 3 or 4 hole pistons in my touring cars. I lengthened the rear shock length by 1mm as advised by the handling kit
It turns out, the shock oil was missing from this kit. Not a problem as I just used 400cst as a base setup
.jpg)
The upper caps have a hole that can be drilled out for zero rebound. I seem to do this for a lot of my kits, so drilled them out to 1.1mm to start
.jpg)
The blue springs are very firm in comparison to the standard silver springs originally supplied. The springs are 29mm long which is different to everything else I use. The shock towers have 6 hole options, 3 upper & lower. As I haven't seen a TC with upper & lower shock mounts for quite some time I used the lower position & used a shock spring that was shorter, but I now have plenty of options. I also fitted alloy spring retainers as they are purple, no other reason!
.jpg)
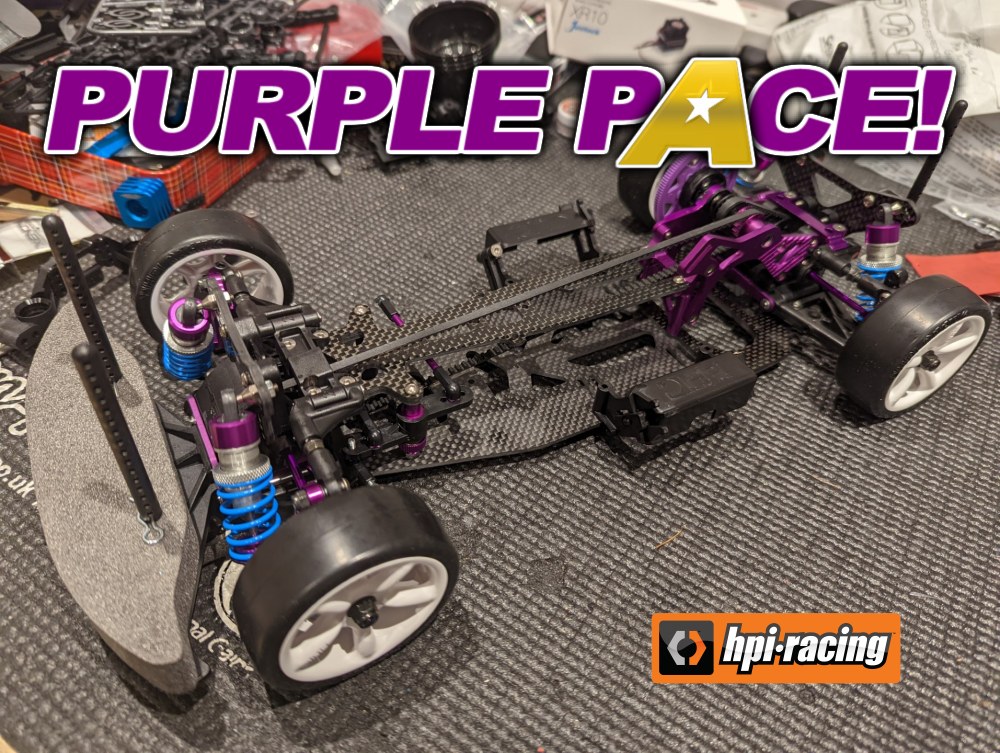
The chassis is now built :)
Electrics
I considered the period correct electrics for this build. In fact, I sourced a Hara Twister & Orion Hara spec motor but changed my mind!
Alongside the iconic cup, there seem to be a few retro races popping up allowing modern electrics. Modern electrics allow these cars to be used, but not cost a lot of money for period equipment. I think this is a good this as I don't miss the task of skimming a comm!
I fitted a Trinity revtech 17.5 motor for initial testing. One event I'm booked in for allows 13.5, but this is fine to test. One thing I've found is the motor will need a fan, it wasn't common practice back in the late 90's, but these brushless motors can get quite warm.
After a bit of thought & searching the box, the car came with side nerf bars to prevent any chassis damage from a side impact. I cut one down & made the surface flat to accommodate a 40mm fan. It sits to cool the endbell, but we'll see how effective it is on the track. It's better than nothing
I had a spare Hobbywing XR10 stock spec esc, so wired it in with no issues
.jpg)
I mounted a SRT 8015 servo, but attached a servo saver for indoor use. A trusty Sanwa RX-481 receiver was fitted. The manual suggests to fit the receiver on the top deck. With the low profile servo & small receiver, everything fits on the lower deck
.jpg)
The lipos proved to be a tricky affair. I fitted the kit stick pack holders, they NEARLY accepted a lipo. One tray will not close. I couldn't see an effective way to cut them to make the lipos fit & stay secure. I laid out a design & had some 3d holders fitted. They will secure with 2 bands, so we'll see how they work out
.jpg)
The spur gear fits on its holder. I chose to use a 106t spur so I could get a ratio that would suit the 17.5 motor. The manual suggests the holder may need sanding, a light application on some 1000 grit sandpaper was enough to prevent binding
Wheels/tyres
These 33deg tyres are a more suitable race tyre. Back in the early 90's, control tyres weren't common so everything was open. These tyres were more suitable for races in Japan. The inserts have sat for 20 years, but folded. I fitted everything to let it all sit & hopefully sit round after time
The wheels are the R5 5 spoke wheels. I've always considered these to be some of the nicest wheels available for racing. Although dish wheels will gain an aero advantage, these look so much nicer that I may keep these for future use! I used 6mm clamp alloy hexes as I'm never a fan of plastic hexes
Bodyshell
The Dodge Stratus was considered the best handling shell design on the market at the time.
.jpg)
A few manufacturers made this body & added their tweaks & the HPI was considered a pretty good choice. This is the lightweight version, so will aid with keeping the centre of gravity low. As it's a HPI, the markings fit this car perfectly!
Track test
A build review wouldn't be complete without a track test to see how it drives
A retro TC event was organized for November 27th at Force raceway near Wakefield. A permanent indoor track with great facilities & very passionate people who run the whole thing. I would recommend a visit. The track is good, but the food is outstanding!
.jpg)
The carpet is black, not sure on the type. As the track gets used 4/5 days every week, there is a lot of rubber and additive laid down
There were 2 main classes. Pre 2001 & 2001-06. As the Pro 2 was released in 1999, I went for the Pre 2001 class
There was a test/tune organized on the Saturday afternoon. A perfect chance to try the car & see what adjustments I needed to make
.jpg)
To test, I fitted some Volante 32's on spoked wheels. My thoughts was that the grip was so high, this would calm it down
The first run was eventful. As I was on a base setup, the car was flipping at every corner. These old cars weren't designed for this level of grip
.jpg)
Unfortunately, I clipped the barrier & snapped a ball cup & lost steering. I replaced the cup & noticed that one wheel was bent. I wasn't surprised by the ball cup as the plastic is 20yrs old, but the wheels were brand new. I dug out some used Volante 28 MICC tyres & kept focusing on the level of grip
Towards the end of the day, I was making progress. It was flipping less & times were getting quicker.
I found the car had too much front end grip. There was too much steering & would flip the car if turned too hard. It also generated a lot of overall grip. I ended up using minimal additive & no additive at all on race day
On the last run, I clipped another barrier with another loss of steering. Turns out I snapped one of the steering wiper arms. I had no spares with me. I rummaged through the parts I had & found the original one I fitted that was too low. I took some measurements & found i needed 5mm of spacers to make it work
Race day
I arrived at the track & managed to source enough shims to fix the car, would it hold for the meeting?
.jpg)
The meeting was set for some open practice, 4 FTD qualifying rounds & 1 final. This is how it was back in the day. I managed to work on more setup to see what I could do
Round 1 was ok, but not great. I had a few rolls & finished 5th overall
Round 2, I tried a front one way diff to see if I could reduce the steering. It went the other way. The car would swap ends if I touched the brakes. I pulled off to save damage to the car
Round 3 was my best run, I kept it clean with no mistakes. I couldn't push as hard as I wanted but happy to end up 4th
.jpg)
Round 4 had the potential to be my best run. The car felt great & I was pushing hard as there was less steering. Unfortunately, I pushed too hard & had a couple of rolls so didn't improve. I applied some additive so I feel this was the problem
This meant that I ended qualifying in fourth position for the final. There was potential for a decent result if I could keep it on the track without rolling. For the final, I widened the rear track & hoped it would help.
The first few laps were good & I was staying with the leaders. The top 3 all had incidents & I managed to make up places. I managed to get up to 2nd & was keeping the pole car behind me. After 3 minutes, the car started over-rotating & spin in to the barriers. Unfortunately, I finished 5th but that's the joys of racing
Overview
This car was a great car to build. This was a perfect showcase to see how the modern touring has developed over the years. HPI did decide to go in a different direction & created the pro 3 which had a radically different design to this car
.jpg)
The parts bags had different steps in different bags, this might be because it was the special edition, but it was a pain not being able to build in bag order
Not many parts needed fettling to work as designed, which you wouldn't expect in a new kit but for an old car like this, it is pretty good.
Since the race meeting, I've had a 3d printed wiper arm to repair & strengthen the steering. Should be a lot stronger now
If you are interested in some retro racing action, then check out https://www.retrorctc.co.uk/


How on earth did you think that adding a one-way would help cure too much front end :D Awesome project no matter what, I will soon rebuild a Pro4 (non-JDM). Thank you!
ReplyDeleteWow what rs4 sport 3 is downgrade from rs4 sport 2 so sad
ReplyDelete